Batman Cake
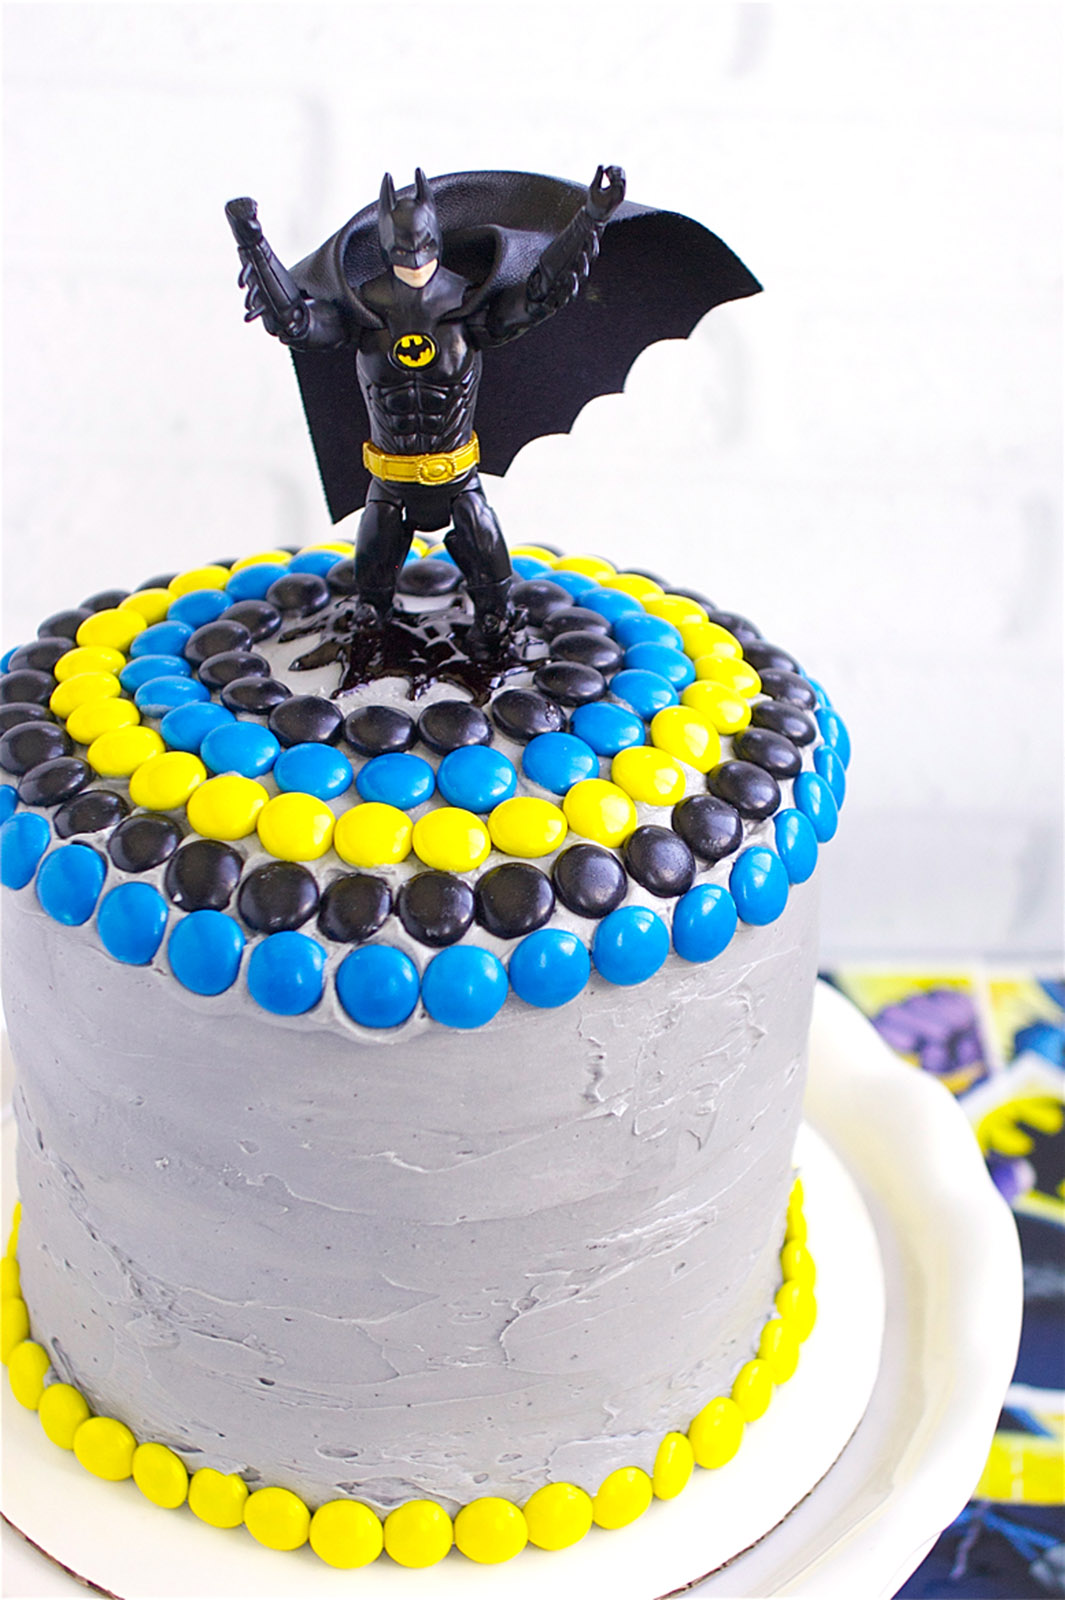
 This year, Charlie’s birthday cake request was for a Batman cake – so the two of us started brainstorming about what he wanted his cake to look like. The action figure on top was obviously the first thing we picked out and then we went from there. I ordered the Batman theme colored M&Ms he wanted to decorate the cake and used complementary colored frosting to really make the cake pop.

The great thing about a cake like this is that you can totally customize it to whatever superhero/transformer your kid likes (I don’t have any experience with girly cakes yet, but I’m sure there are little plastic girl dolls that would work as well). The cake recipe is my favorite chocolate cake – it’s moist and chocolatey but not overly rich. As good as the cake is, the frosting is still, by far, the best part. It’s my favorite vanilla frosting that I use all the time. It’s insanely good. I always make sure to make a little bit extra… just in case some gets accidentally knocked out of the bowl 😉

I made this cake right before we left for vacation last week and it pained me to have to throw away a remaining piece before we left in the morning. The cake is so good that I even had to take a couple of bites… at 5:30 AM… right before I tossed it. {Sigh} So sad. Good news is, I’m making a bigger version for our family party coming up this weekend. This time, none will go to waste.


Batman Cake
Ingredients:
Cake
- 1/4 cup good semi sweet chocolate (I used Ghirardelli semi-sweet chips)
- 3/4 cup hot, freshly brewed coffee (the cake will NOT taste like coffee, I promise)
- 1 1/2 cups sugar
- 1 1/4 cups all-purpose flour
- 2/3 cups unsweetened cocoa powder
- 1 tsp baking soda
- Scant 1/2 tsp baking powder
- 1/2 tsp salt
- 1 extra large egg (or 1 1/2 large eggs)
- 1/3 cup vegetable oil
- 3/4 cups well-shaked buttermilk (if you don't have this on hand, you can make it using milk and white vinegar – just add 1 tbsp of white vinegar to a measuring cup and then fill the cup up to 1 cup with milk, let it sit for 5 minutes before using)
- 1/2 tsp vanilla extract
- Black gel food coloring
Frosting
- 2 1/4 cups plus 3 tbsp (4 sticks plus 3 tbsp) unsalted butter, at room temperature
- 4 1/2 cups confectioners’ sugar, sifted
- Pinch of salt
- 3 tbsp heavy cream
- 1 1/2 tbsp vanilla extract
- Yellow gel food coloring
- Black gel food coloring
Directions:
Cake
- Lightly spray the cake pan with nonstick spray and then line the cake pan with a parchment paper round - then lightly spray with nonstic spray again.
- Place the chocolate chips in a bowl and combine with hot coffee. Let mixture stand, stirring occasionally, until chocolate is melted and mixture is smooth.
- Sift together sugar, flour, cocoa powder, baking soda, baking powder, and salt - set aside.
- In another large bowl with an electric mixer beat eggs until thickened slightly and lemon colored (about 3 minutes with a standing mixer or 5 minutes with a hand-held mixer).
- Slowly add oil, buttermilk, vanilla, and melted chocolate mixture to eggs, beating until combined well.
- Add flour and sugar mixture and beat on medium speed until just combined - don't overmix.
- Lastly, add in a few drops of the black food coloring and mix just until the color is evenly blended.
- Divide batter evenly into 5 bowls. (I only have one 6" round pan, so I just baked each layer one at a time.)
- Bake at 350°F in the middle rack of the oven for approximately 20-22 minutes or until a tester inserted in center comes out clean.
- Once the cake has cooled a bit flip it out of the pan and let it cool completely on a plate. Continue doing this with each layer until all 5 are baked. Once they've all completely cooled, wrap each layer individually in plastic wrap and place in the freezer for at least an hour (this will make stacking and frosting easier).
Frosting
- Place the butter in the bowl of an electric mixer fitted with the whisk attachment.
- Whip on medium-high speed until smooth, about 1 minute.
- Add the confectioners’ sugar to the bowl and mix on medium-low speed just until incorporated.
- Add in the salt and continue to beat on medium-high speed until smooth, about 1-2 minutes.
- Mix in the heavy cream and vanilla on low speed just until incorporated.
- Increase the mixer speed and whip on high speed until light and fluffy, scraping down the bowl as needed, about 4-5 minutes.
- Separate out 1/3 of the frosting - this will be used in between the layers. Add 4-5 drops of yellow gel food coloring until you've reached the right shade of yellow - mix well. At this point, before turning the rest of the frosting gray, I would stack and layer the cake and yellow frosting to make sure you have enough. You can always borrow from the remaining frosting if you need more yellow before turning it gray.
- To stack the layers, place one layer "domed side" down so you have the flat bottom of the cake on top. Add about 1/4 of the yellow frosting to the center and spread it in an even layer. Repeat this with the remaining layers.
- Now, turn the rest of the frosting gray - add in 1 small drop of black gel food coloring and mix - add in more little by little until you reach desired color.
- To frost the exterior of the cake start with a thin layer of frosting all over - this is the crumb coat - it helps to secure in loose crumbs so your outer layer is clean.
- Frost the exterior of the cake with the gray frosting and use a frosting spatula dipped in hot water to get really smooth sides.
- Decorate with M&Ms and your favorite superhero action figure!
Frosting adapted from Annie's Eats